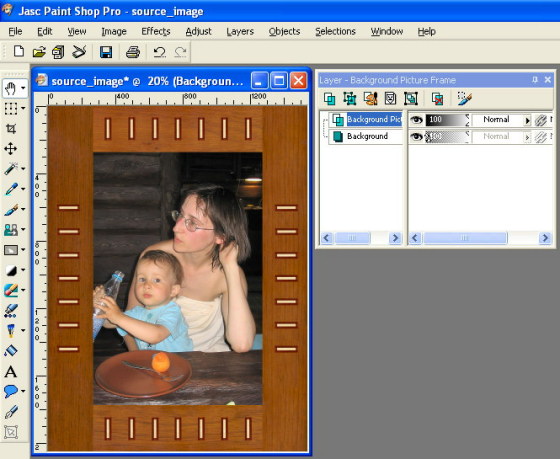
Step 1: Open an image
|
To open an image, choose File->Open. Browse for the image file then click OK.
|
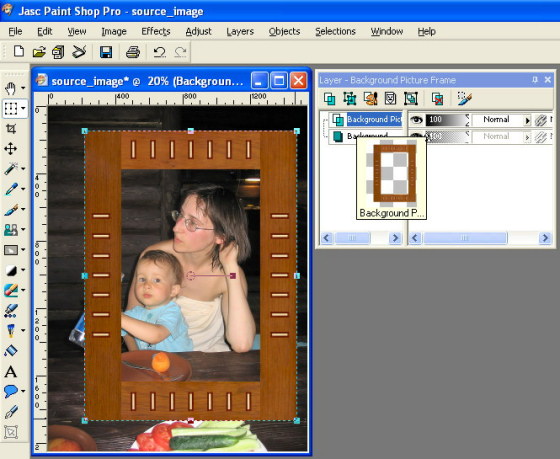
Step 2: Add frame to your image
|
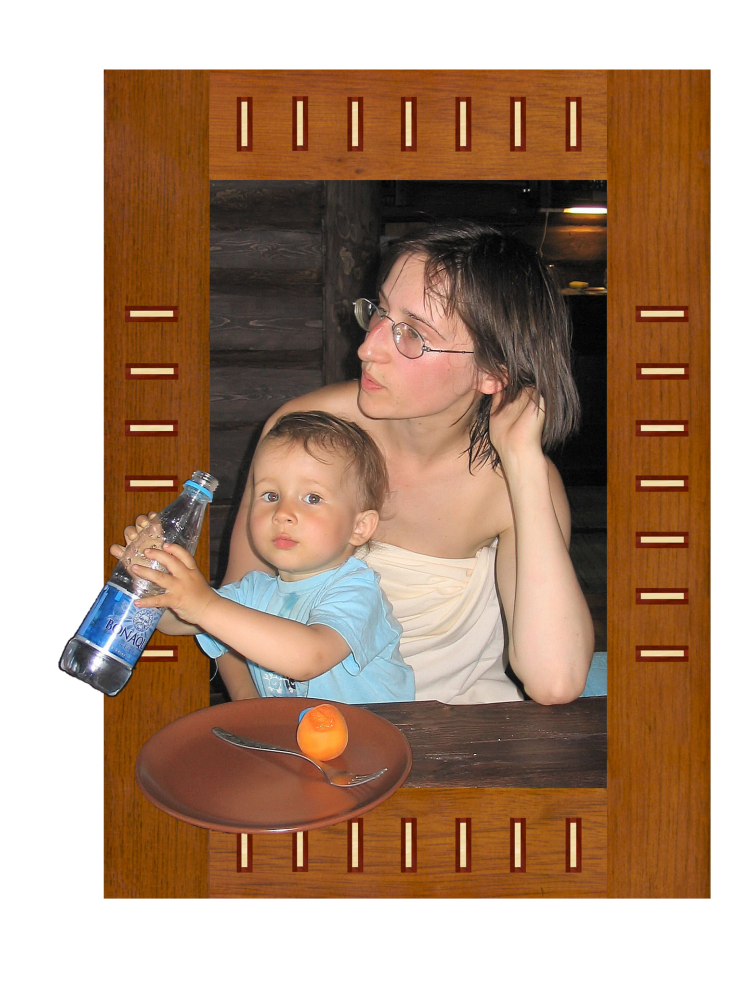
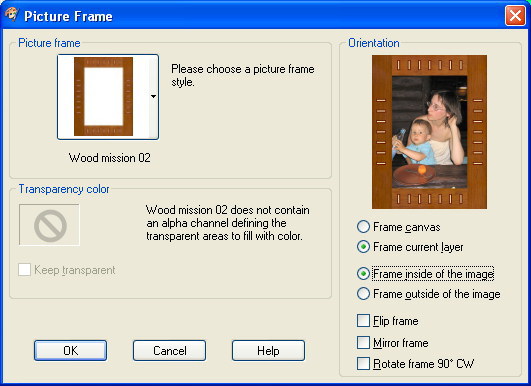
Using command Image->Picture Frame put frame you like on new layer.
Turn on Frame current layer and Frame inside of the image radio-buttons in Orientation section.
|
You need not to use Paint Shop Pro stock frames only. You can take any program or plugin for frame creation, for example Image Frame by ImageSkill Software.
It is important to create image frame in new layer.
|
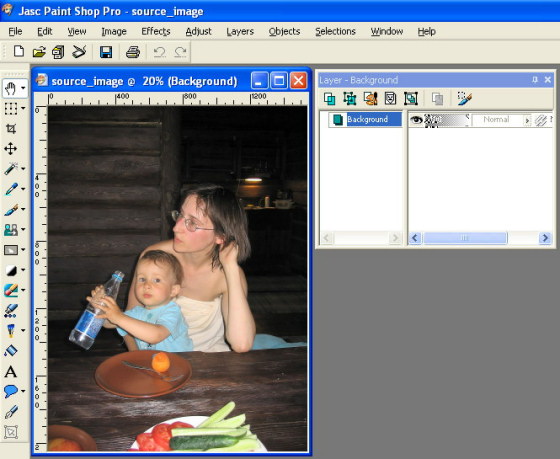
You can see two layers on the image – the first one is our original image with the file name “Background”, the second one is an image frame with the file name “Background Picture Frame”.
You can show layers in Layer palette (View->Palettes->Layer, hot-key is F8).
|
|
You can adjust your frame by Deform tool (hot-key is “D”).
Stretch and move image frame in order to achieve desirable effect.
|
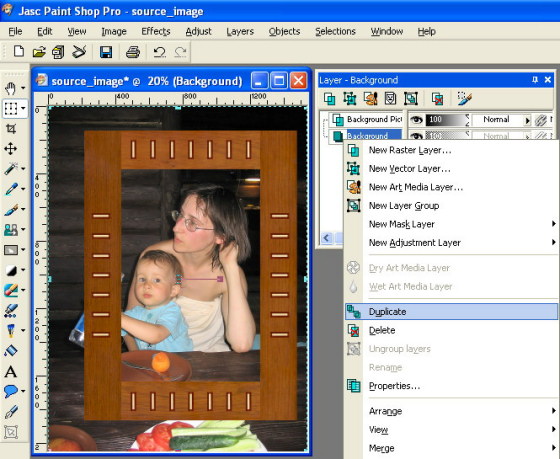
Step 3: Duplicate original image
|
In Layer palette select “Background” layer to choose an original image and duplicate it using right-click drop-down menu or Layers->Duplicate command.
|
|
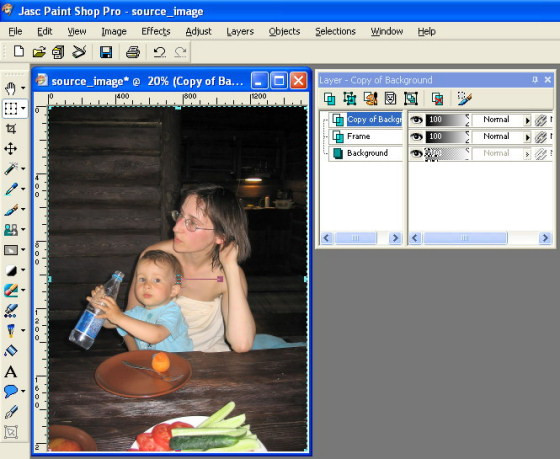
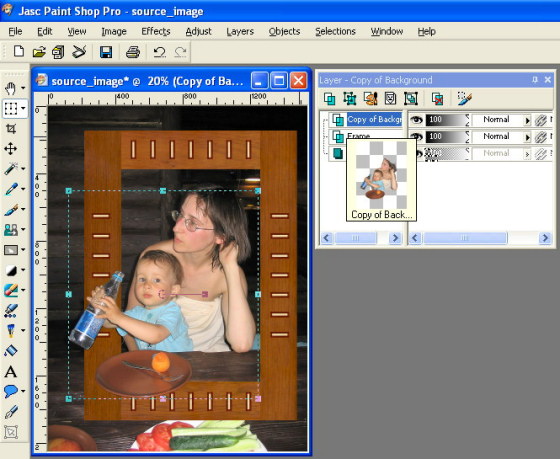
You just have now 3 layers listed from bottom to top: “Background” - original image,
“Copy of Background” - copy of original image,
“Background Picture Frame” - image frame.
Move the second layer “Copy of Background” to top using mouse or Layers->Arrange->Bring to Top command.
At present you have the copy of original image as the top layer, the image frame as the middle layer and the source image as the bottom layer.
|
Step 4: Extract all parts of the image that are to be jumped out of frame
To achieve “Out of bounds” effect you should put all parts of the image having this effect on image frame.
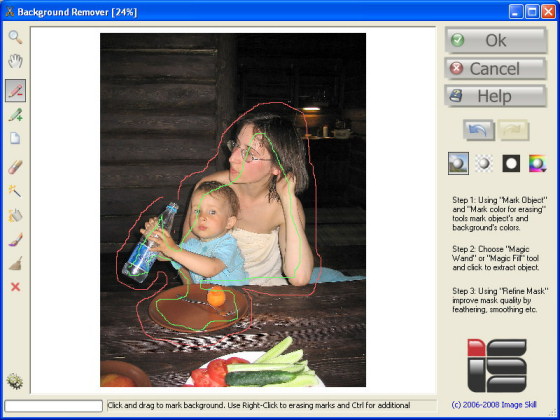
Run Background Remover plug-in by Effects->ImageSkill->Background Remover 3 and extract the baby with bottle.
|
Mark object and background by green and red line (tools Mark Object and Mark color for erasing).
You can switch between mode by Ctrl modification and erase wrong marks by right-mouse click.
|
|
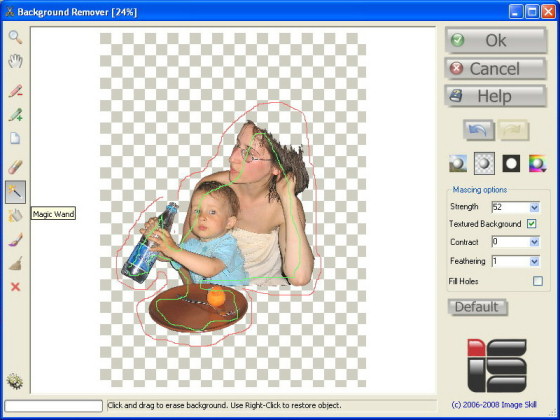
Select Magic Wand tool and make a mouse click.
After extraction press OK button and return to Paint Shop Pro.
|
Of course, you can extract all jumped out parts of the image you need by using any other tool (Manual Eraser, Selection tool, Magic Wand etc.).
|
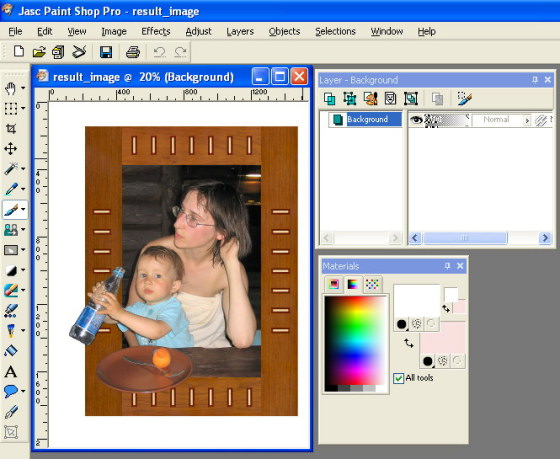
Here you have almost ready “Out of bounds” image.
|
Step 5: Save a final result
|
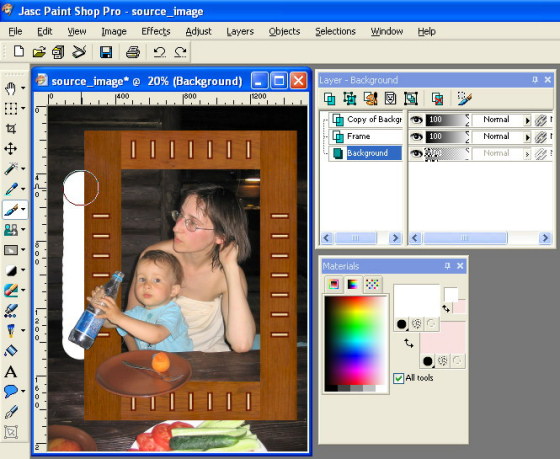
To strengthen effect you can erase parts beyond the image frame.
Make the original image active selecting the bottom layer in Layers palette. Choose Paint Brush tool (hot-key is “B”).
Select desirable color (for example white) and paint all parts beyond the image frame.
If you want to make parts beyond the image frame transparent instead of coloring, choose Eraser tool (hot-key is “X”).
|
|
Merge the result using Layer->Merge->Merge All (Flatten) and save result in suitable graphic format (BMP, JPEG etc.)
Note: if you erase parts beyond the image frame instead of coloring them, do not merge image, but simply save it in PNG format.
|
Good luck!
|